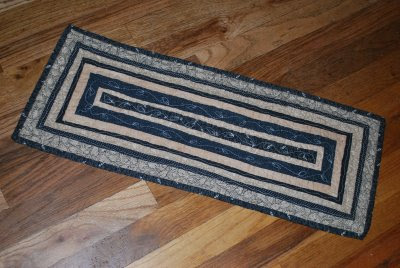
 I designed these little table runners a few years back as an effort to use up some scraps. Making this table runner, is more of a process than a pattern. And may I add that they fit much better on a dresser than a table, as they are rather small. Finished size for Small Table Runner: 11 ½” x 27”Finished size for Large Table Runner: 11 ½” x 36”
The following chart is for cutting your fabrics. It tells you the width to cut each strip as well as how many lineal inches you will need. If a row calls for 72”, you will cut enough strips to total that length. For instance, if the scrap of fabric you are using is 20” long, you would cut four strips of it to equal at least the 72” required.
Row # Strip Width Lineal Inches Needed for Small Size Lineal Inches Needed for Large Size
#1 1 ½” 18” 27”
#2 1” 40” 58”
#3 1 ½” 48” 63”
#4 1 ¼” 54” 71”
#5 1” 58” 72”
#6 1 ¼” 64” 78”
#7 1” 68” 82”
#8 1 ½” 72” 88”
Binding 2 ½” 94” 100”
After you have cut all of your strips, sew all of the Row #2 pieces together, end to end to create a strip 18” (27”) long. Do this for each row, and for the binding. I don’t recommend piecing your Row #1 strip.
Basically, you start in the middle with Row #1 and add each row on as you would add borders on a quilt. Add the top and bottom (long sides) first, and then the short sides. Place Row #2 strip on of Row #1 strip, right sides together of course, and sew a ¼” seam down the long edge. Trim excess fabric and press seam allowances to the center. Now sew a strip of Row #2 the the opposite side of Row #1. This will give you a striped piece of fabric: Row #2, Row #1, and Row #2. Now add the side borders of Row #2 to Row #1. Make sure you press after each top and bottom row, and then again after each side row. You will also want to be very exact on your seam allowance, as this is a small project which doesn’t leave much room for error. Keep adding each row on until you have completed row #8. At this point you will quilt your project, and then add the binding.


1 comment:
I just bought a dresser for my sewing room on craigslist that has some stains on the top. This would be the perfect fix!
Post a Comment